Selecting Candle-Shaped LED Bulbs for Chandelier Projects
A practical guide to choosing, installing, and maintaining candle-shaped LED bulbs for residential, hospitality, and commercial chandeliers.

Chandeliers depend on more than decorative form. The bulb is visible from multiple angles, often repeated across several arms, and can influence the fixture’s proportions, sparkle, glare, and overall character. For this reason, selecting candle-shaped LED bulbs for chandeliers requires a combination of visual judgment, technical compatibility, and practical maintenance planning.
This guide is intended for international buyers, distributors, installers, hospitality teams, and informed consumers. Product dimensions, bases, electrical ratings, dimming compatibility, and photometric information should always be confirmed with the supplier before ordering. If a fixture requires rewiring, modification, or investigation of an electrical fault, use a qualified electrician familiar with the applicable local requirements.
What makes a candle-shaped LED bulb suitable for a chandelier?
A suitable bulb should fit the socket, sit comfortably within the shade or decorative sleeve, and produce a consistent appearance across the whole fixture. Candle bulbs are commonly used where a narrow, flame-like or torpedo-style profile is preferred over a round globe. The right option depends on the chandelier design rather than on appearance alone.
Check the essential specifications
- Socket base: Confirm the exact base type and diameter. E14 and E12 are common in different markets, but they are not interchangeable. Do not rely on visual similarity.
- Bulb dimensions: Check total length and maximum diameter against the socket cup, shade, glass sleeve, and nearby decorative elements.
- Electrical rating: Match the bulb’s voltage and frequency requirements to the installation. For international supply, ask the supplier for the applicable rating and product documentation.
- Light output: Select the required lumen level for the room and fixture. A chandelier with many exposed bulbs may need a different output balance from a smaller fixture with opaque shades.
- Color appearance: Choose a consistent color temperature and color-rendering specification for all bulbs in the same chandelier. Warm light is often selected for decorative settings, but the project brief should determine the final choice.
- Dimming: If the chandelier is connected to a dimmer, confirm that the bulb is designed for dimming and that the dimmer and control system are compatible.
For a consolidated product search, review TITK’s LED candle bulb range and compare the published specifications with the fixture requirements.
Choose the appearance for the chandelier design
Because chandelier bulbs are usually visible, appearance should be assessed at the intended viewing distance and from several angles. A clear bulb can emphasize filament structure and decorative sparkle, while an opal or diffused finish can create a softer visual effect. The correct choice depends on whether the project prioritizes visible filament detail, reduced glare, shade compatibility, or a more uniform luminous surface.
Flame-tip, torpedo, and straight candle profiles
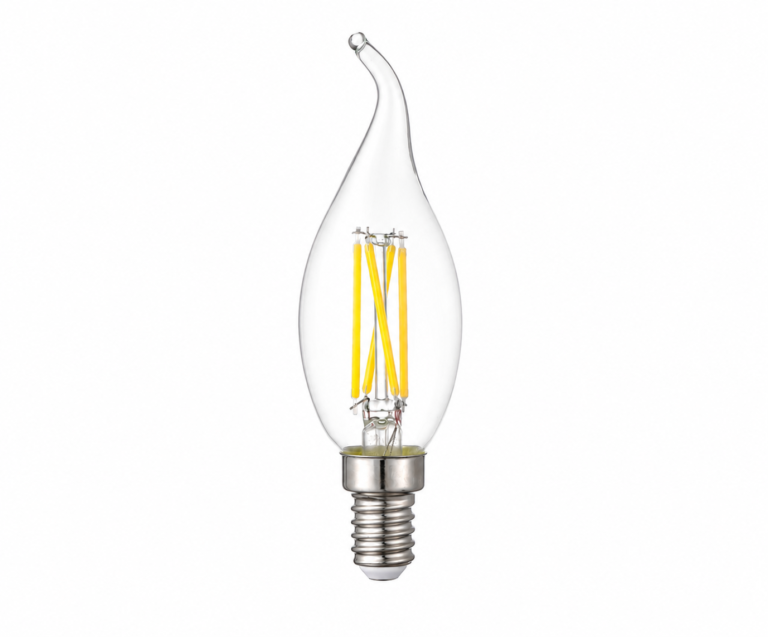
Flame-tip profiles introduce a more traditional silhouette and can suit ornate fixtures. Torpedo or pointed profiles are useful where the bulb is exposed but a compact decorative shape is required. Straight candle forms may work better in contemporary chandeliers or fixtures with narrow shades. Always compare the bulb shape with the socket angle and the chandelier’s arm geometry.
Keep every bulb visually consistent
In a multi-lamp chandelier, small differences become noticeable. Order the same model, finish, color appearance, and output specification wherever possible. Mixing bulbs from different designs or production batches may create visible variation in filament layout, glass tint, or brightness. For larger projects, request a sample before approving the full quantity and retain the approved sample for incoming inspection.
Control Sample-to-Order Variation
Record the approved combination in writing before placing the order:
- Base and fixture socket
- Voltage, frequency, and control method
- Overall dimensions and required clearance
- Glass finish, filament arrangement, and colour appearance
Attach the exact model code, product drawing, and approved reference sample to the purchasing record. Require written approval before any substitution or specification change.
During incoming inspection, compare the bulk order with the approved reference before releasing the bulbs for installation.
Consider dimming and control compatibility
Dimming is a frequent source of installation problems. A bulb may be described as dimmable, yet the result can depend on the dimmer type, minimum load, control method, wiring arrangement, and the number of bulbs connected. Flicker, limited dimming range, delayed response, or uneven brightness should not be assumed to indicate a bulb defect before the complete system is checked.
- Identify the existing dimmer or lighting-control system.
- Confirm the bulb’s dimming requirements with the supplier.
- Check whether the intended quantity and total load are suitable for the control equipment.
- Test a representative combination before purchasing the full project quantity.
- If performance remains unstable, ask a qualified electrician or lighting professional to assess the installation.
Where dimming is not required, a non-dimmable option may simplify specification. For projects that do require control, compare the available dimmable LED bulbs against the control system rather than selecting by appearance alone.
Practical installation procedure
Installation should follow the chandelier manufacturer’s instructions and the requirements applicable to the location. The steps below are a general handling guide, not a substitute for professional electrical work.
- Prepare the work area: Switch off the fixture using the appropriate control and allow existing bulbs to cool. For a high or difficult-to-reach chandelier, use suitable access equipment and do not work from an unstable surface.
- Inspect before fitting: Check the new bulbs for damaged glass, loose components, bent bases, or packaging debris. Do not install a damaged bulb.
- Confirm the socket: Verify that the bulb base matches the socket. Never force a bulb into place or use an adapter unless the fixture and supplier documentation specifically support that arrangement.
- Insert without pressure: Hold the bulb by its base where possible and turn it gently into the socket. Avoid twisting the glass envelope or filament structure.
- Check clearance: Ensure the bulb does not touch shades, crystals, trim, or other materials unless the fixture instructions permit that arrangement.
- Test gradually: Restore power and check for consistent illumination, unusual noise, flicker, heat, or a loose connection. Stop using the fixture if a fault appears.
If the chandelier needs socket replacement, rewiring, control changes, or work at height beyond your team’s competence, arrange qualified professional assistance. Do not attempt to correct electrical faults by repeatedly replacing bulbs.
Maintenance and replacement planning
Good maintenance protects both the bulbs and the chandelier. Before cleaning, follow the fixture manufacturer’s instructions and isolate the fixture as appropriate. Let bulbs cool, support fragile decorative parts, and use a soft, dry or suitably approved cloth. Avoid liquid entering the socket, control equipment, or other electrical parts.
Inspection points for facilities and installers
- Look for darkened glass, intermittent operation, visible damage, or a loose base.
- Check whether one bulb differs noticeably in color or brightness from the others.
- Inspect shades and decorative covers for dust that may reduce the intended appearance.
- Record the selected model and specification so replacements can be matched later.
- Keep spare bulbs in their original protective packaging in a dry storage area.
When replacing one bulb in a coordinated chandelier, compare it with the approved sample or the fixture schedule. If several bulbs show similar symptoms, investigate the dimmer, socket condition, connections, and supply rather than assuming that every bulb has failed.
Specification checklist for B2B orders
| Requirement | Information to confirm |
|---|---|
| Mechanical fit | Base type, bulb dimensions, shape, and clearance |
| Electrical fit | Voltage, frequency, socket arrangement, and fixture rating |
| Light quality | Color temperature, color rendering, finish, and lumen output |
| Controls | Dimming method, compatibility, and test requirements |
| Supply planning | Sample approval, replacement matching, packaging, and documentation |
For projects requiring a broader decorative selection, TITK’s LED filament bulb category and decorative light bulb category can be used as starting points. Confirm current specifications, availability, and suitability directly with the supplier.
Final recommendations
The best candle-shaped LED bulbs for chandeliers are those that combine reliable mechanical fit, consistent visual appearance, suitable light quality, and compatibility with the installed controls. For residential and hospitality projects alike, approve a sample, verify the complete specification, and plan replacements before installation begins. Careful handling and simple inspection routines can then help preserve the chandelier’s appearance over time.
Contact TITK to discuss the specifications needed for your chandelier application, or use the checklist above when comparing suitable products and suppliers.